How to Clean a Humidifier: Descaling and Everyday Care
We may earn a commission from affiliate links to products on this page, at no additional cost to you. Learn more.
Once the heat comes on for fall and winter, the house feels more comfortable, but the air gets drier, too. That means it’s time to bring out the humidifier. I just don’t fill it up and switch it on right away:
If it’s a humidifier I put away last season, I check the tank, base, and removable parts first. I deal with any scale before using it. If I find grime, mold-like spots, or a noticeable odor, I give it a more thorough cleaning and follow that model’s instructions if it needs disinfecting.
If it’s brand-new, I rinse the parts the manual says to clean before first use. Unless the manufacturer calls for anything else, I don’t add extra cleaning steps.
This guide covers portable home humidifiers, not whole-house units connected to a heating system.
What Cleaning Supplies Do You Need?
Tools and supplies:
- A clean, soft cloth and paper towels
- An old toothbrush, a crevice brush, or cotton swabs
- White vinegar
You can also pick up a humidifier cleaning brush, a humidifier descaler, or citric acid if needed.
What I look for when buying:
Look for a crevice brush that can reach inside the tank without overly stiff bristles. Try not to scratch the inside while cleaning it, or you’ll just make the next cleanup harder.
I usually use white vinegar to deal with scale inside the humidifier, and I keep some citric acid on hand, too. Which one I use depends on the cleaning job.
You don’t need to buy all your humidifier cleaning products at once. Before using distilled white vinegar, check whether your model allows it. If you’ve bought a humidifier cleaner or humidifier cleaning solution, read what it’s for, how to dilute it, and how long it should stay in contact with the surface. A product labeled “cleaner” doesn’t necessarily both descale and disinfect.
How to Clean a Humidifier: Follow These Six Steps
1. Unplug It, and Let a Warm-Mist Unit Cool
Turn the humidifier off and unplug it. If you’ve just used the warm-mist setting, let the water and heating parts cool completely before cleaning. Set it on a water-resistant counter beside the sink; don’t carry a hot tank around while taking the unit apart.
2. Empty the Old Water and Remove the Washable Parts
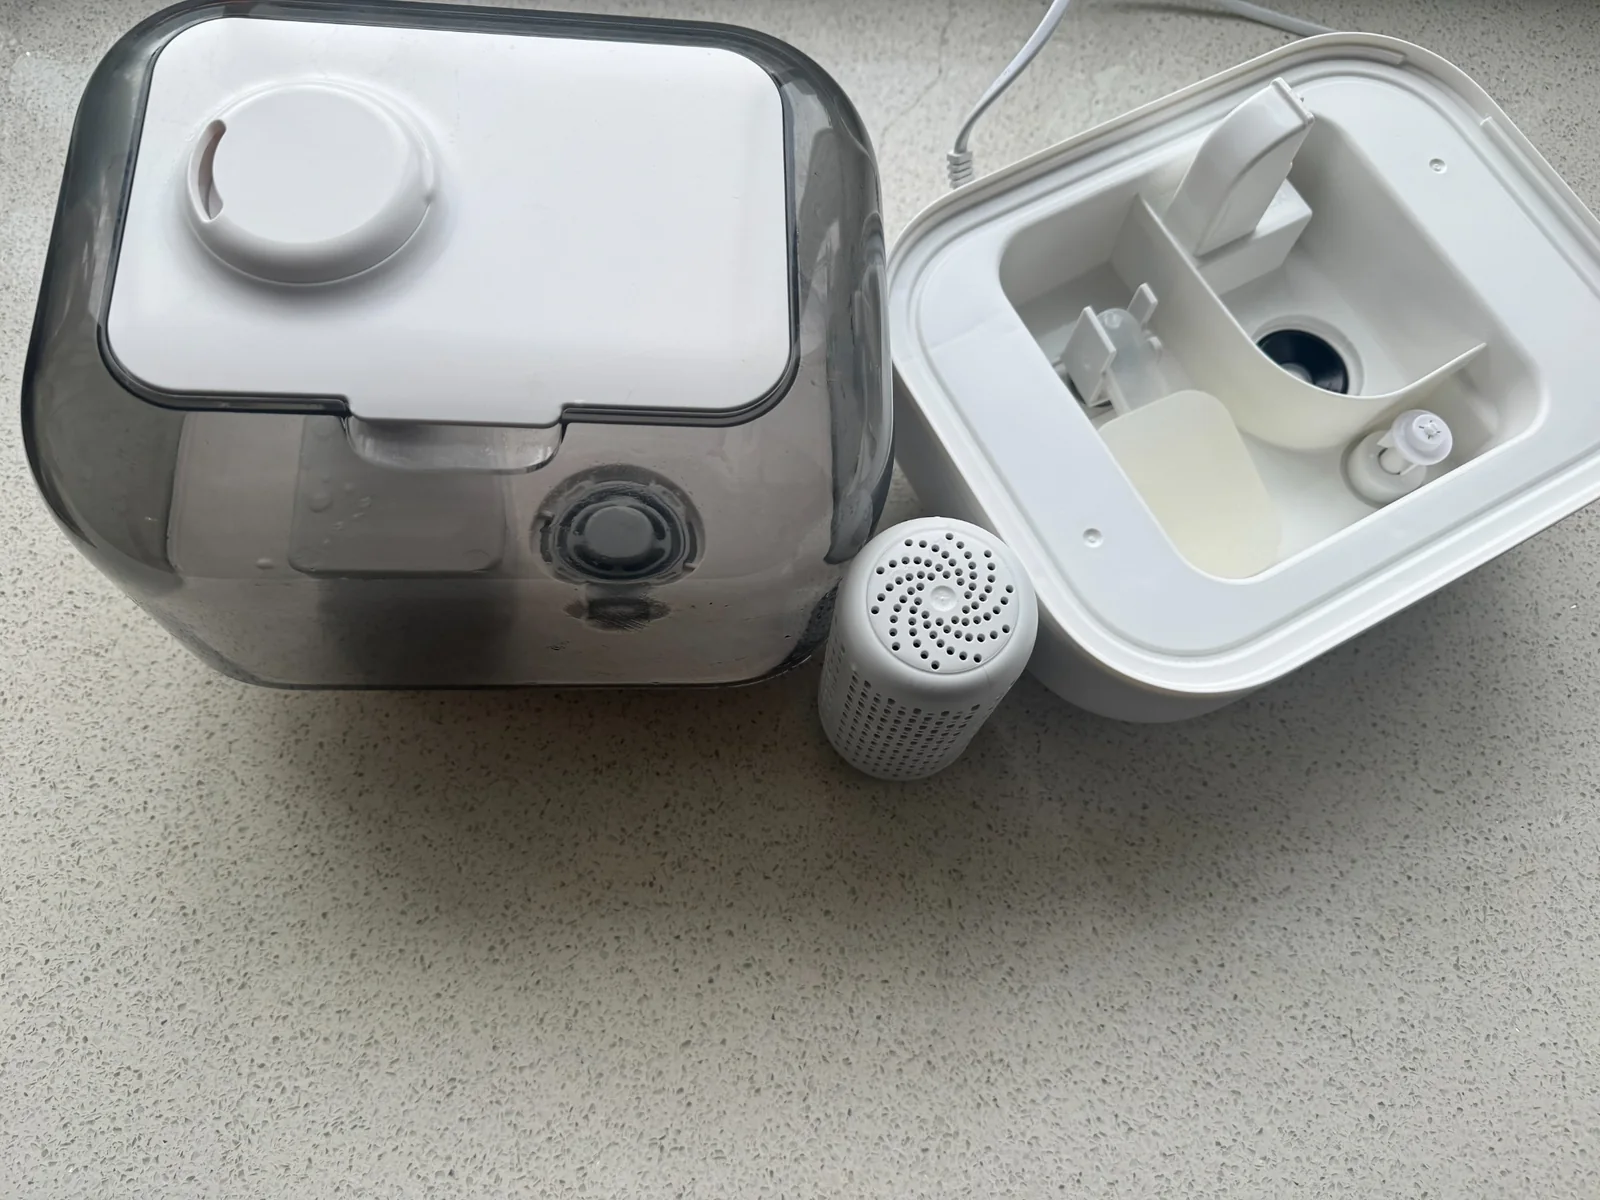
Remove the tank, lid, mist nozzle, and any tray the manual says you can take out. Set the filter, wick, or demineralization cartridge aside rather than soaking it along with the tank. Leave parts with a power cord, motor, or control panel on the counter.
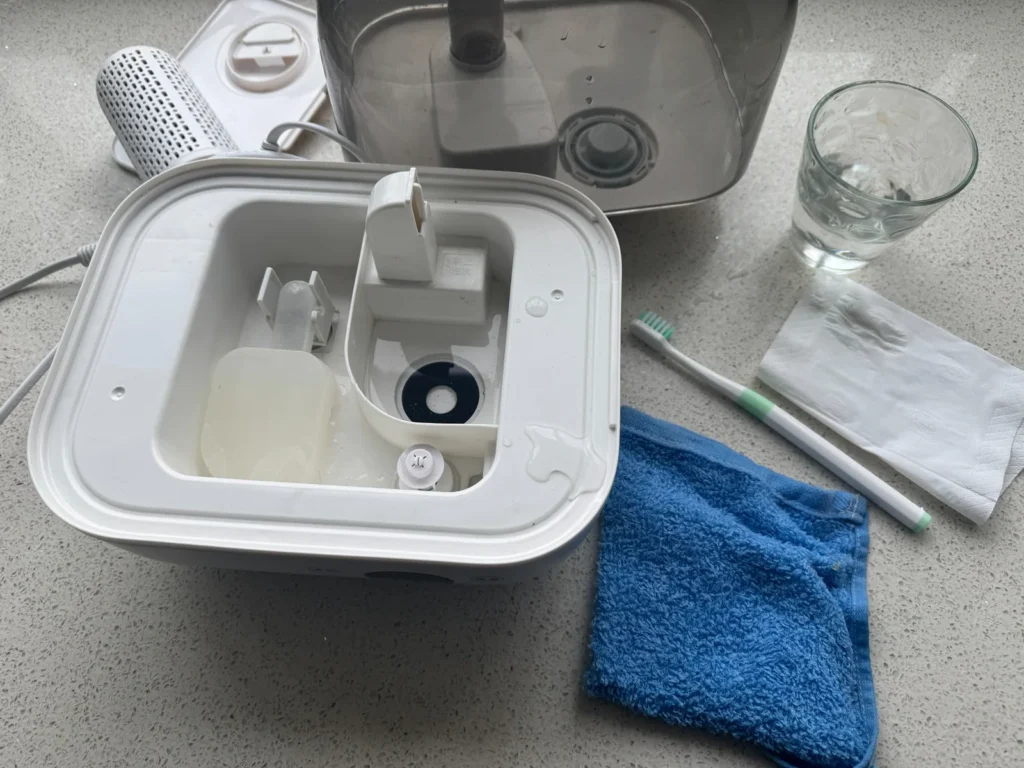
Empty the tank and the basin in the base, then rinse away loose debris. When you clean a humidifier tank, pay attention to the waterline, the underside of the lid, and the openings and connections. Cleaning the inside of a humidifier means more than wiping down its case: the surfaces that regularly touch water need attention, too.
A toothbrush or crevice brush will usually take care of ordinary grime.
Use dish soap only if your model’s instructions specifically allow it.
3. Descale It if You Find Hard Mineral Buildup
The key to figuring out how to descale a humidifier isn’t scrubbing harder. It’s softening the mineral buildup first.
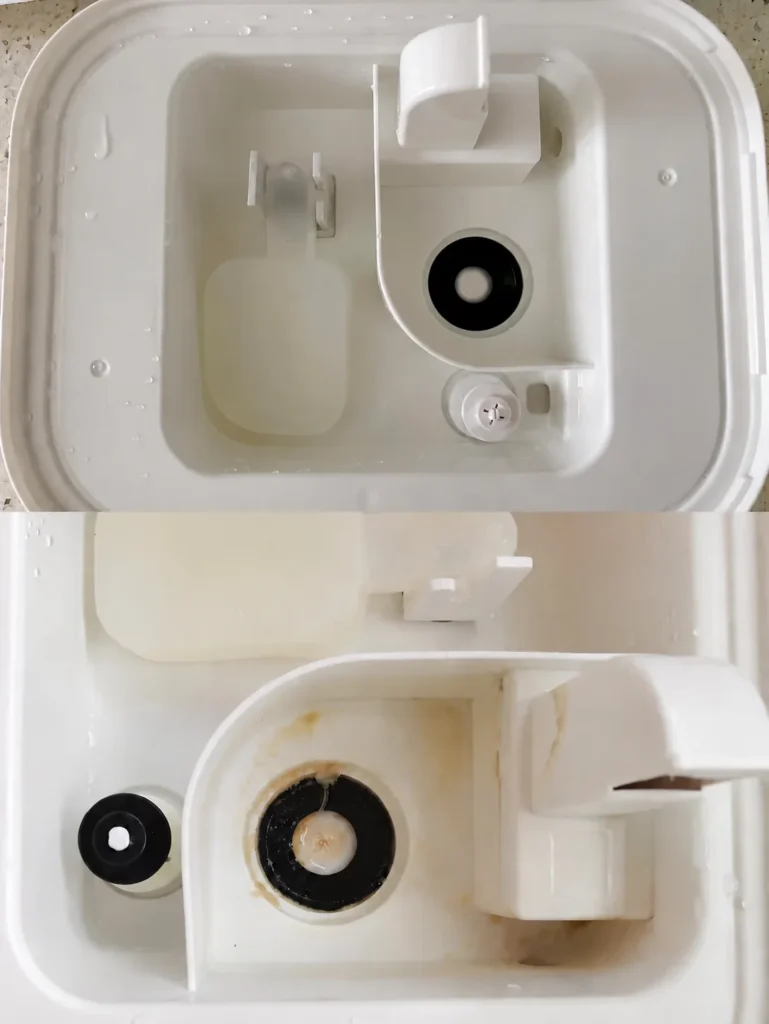
Here’s how to clean a humidifier with vinegar using my paper towel method: I pour the vinegar into a container, soak a paper towel in it, and lay it over the scale.
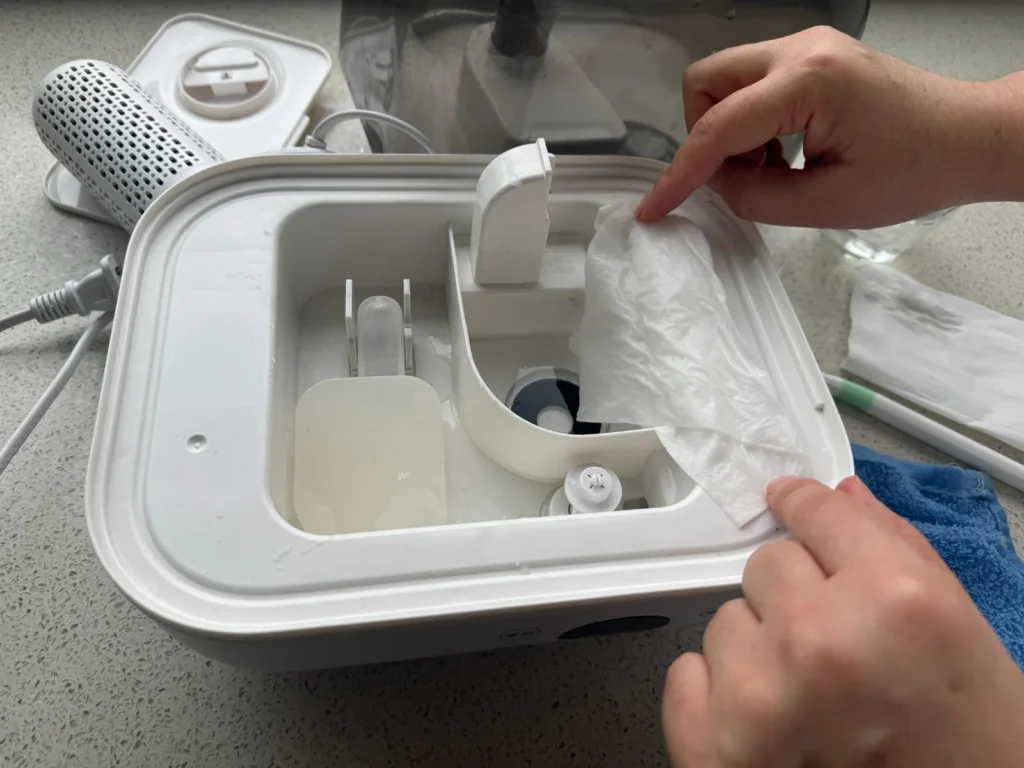
Keep it away from electrical connections and air outlets. For the ordinary buildup I deal with, about 20 minutes is usually enough.
Remove the paper towel and try gently brushing the area with a toothbrush. The scale and grime will usually come away by then. If some scale remains, try leaving the paper towel in place a little longer rather than prying it off with a knife or scraping it with a wire brush.
When vinegar isn’t doing the job, that’s when I turn to citric acid or a dedicated humidifier descaler or humidifier descaling solution.
I regularly use this citric acid. Besides descaling my humidifier, I use it on shower glass, the kettle, and other places that collect mineral deposits. It’s surprisingly handy.
How I use it:
I keep the citric acid dry until I need it, then mix it into a solution. I usually add 4 teaspoons to 1 liter of water and soak small parts that can be soaked. Sometimes I pour it into my kettle, bring it to a boil, and then let it sit for 20 minutes. It has worked well on stubborn scale. Rinse everything thoroughly with clean water afterward.
ⓘ Note: Follow the product’s directions for its specific use.
4. Clean the Lid, Nozzle, and Accessible Corners
Clean the removable pieces one at a time. Don’t pull hard on seals or floats. For the base, clean only the basin specified in the manual and wipe the outside with a well-wrung damp cloth. Don’t soak the entire electrical base in the sink.
If your humidifier has an ultrasonic plate, check the next section for model-specific reminders. Don’t use the same scrubbing pressure on it that you’d use inside a bottle.
5. Rinse Thoroughly Before Any Disinfection
Don’t rush to put everything back together. I rinse the washable parts several times with fresh water, especially the tank connections, lid, and basin where cleaning solution can collect. The point isn’t just to weaken the smell; it’s to wash away loosened grime and cleaning-product residue.
⚠️If the humidifier also needs disinfecting, thoroughly rinse away the vinegar, citric acid, or descaler first. Don’t mix different cleaning products together.
6. Let Everything Dry, Then Reassemble
Use a clean, soft cloth to soak up leftover water, leave the tank open, and spread the removable parts out to dry. Put the seals, filter, and nozzle back in their original positions. Make sure the electrical parts of the base, plug, and connections are dry before refilling with fresh water and using it again. If you’re putting the humidifier away, let everything dry completely first.
That’s how I clean my humidifier from start to finish. I hope it makes the job easier for you.
Ultrasonic, Warm-Mist, and Evaporative: What Needs Different Care?
Before deciding how to clean a cool mist humidifier, check whether it’s ultrasonic, evaporative, or another design. ‘Cool mist’ describes the output temperature, not how every part should be cleaned.
|
Type |
What to focus on |
What not to assume |
|---|---|---|
|
Ultrasonic humidifier cleaning |
The tank, the basin in the base, and the misting plate, following the manual. |
Do not assume you can scrape the plate with a stiff brush. Keep water out of the air outlet. |
|
Warm-mist humidifier |
Let it cool first, then deal with scale in the basin and on the heating parts. |
Do not take it apart while hot or immerse the entire electrical base. |
|
Evaporative humidifier |
Wash the tank and tray; assess the wick or filter separately. |
Do not assume every filter can be soaked in vinegar or scrubbed. |
These types share the same basic sequence—unplug, empty, rinse, and dry—but not every cleaning method is interchangeable. When figuring out how to clean an ultrasonic humidifier, pay particular attention to the misting parts. Some manufacturers specify cotton swabs, others a soft cloth or the included tool. Use what your model calls for.
Do Slime, Mold-Like Spots, or Odors Mean It Needs Disinfecting?
If I open the tank and find slime or mold-like spots, or my humidifier smells musty, I don’t just wipe the surface and keep using it. This needs more attention than ordinary scale.
⭕→Step 1: Turn it off, unplug it, and empty the old water.
Separate the removable tank, nozzle, and tray. Take out the filter or wick for a separate check instead of soaking it with everything else.
⭕→Step 2: Remove the visible grime first.
Use clean water and a soft brush to remove slime and surface grime. If there’s obvious scale as well, remove it first, then rinse thoroughly with clean water.
⭕→Step 3: Check whether this model needs disinfecting.
If the manual explains how to disinfect a humidifier of this model, I follow its specified product, concentration, and contact time. If I’ve used vinegar, citric acid, or another descaler, I rinse it away before moving on. Don’t mix different cleaners together.
⭕→Step 4: Rinse, dry, and check it again.
Once the odor is gone and there’s no visible residue, reassemble it according to the instructions. If the filter is moldy, stiff, or still smells off, I don’t keep washing it over and over. A compatible replacement humidifier filter is the more practical choice.
If it still smells musty after a thorough cleaning, or the buildup is somewhere inside that I can’t reach, I stop using it rather than keep adding stronger cleaners.
Can You Clean a Humidifier Filter, or Should You Replace It?
When deciding how to clean a humidifier filter, first check what kind it is—not which cleaner to use.
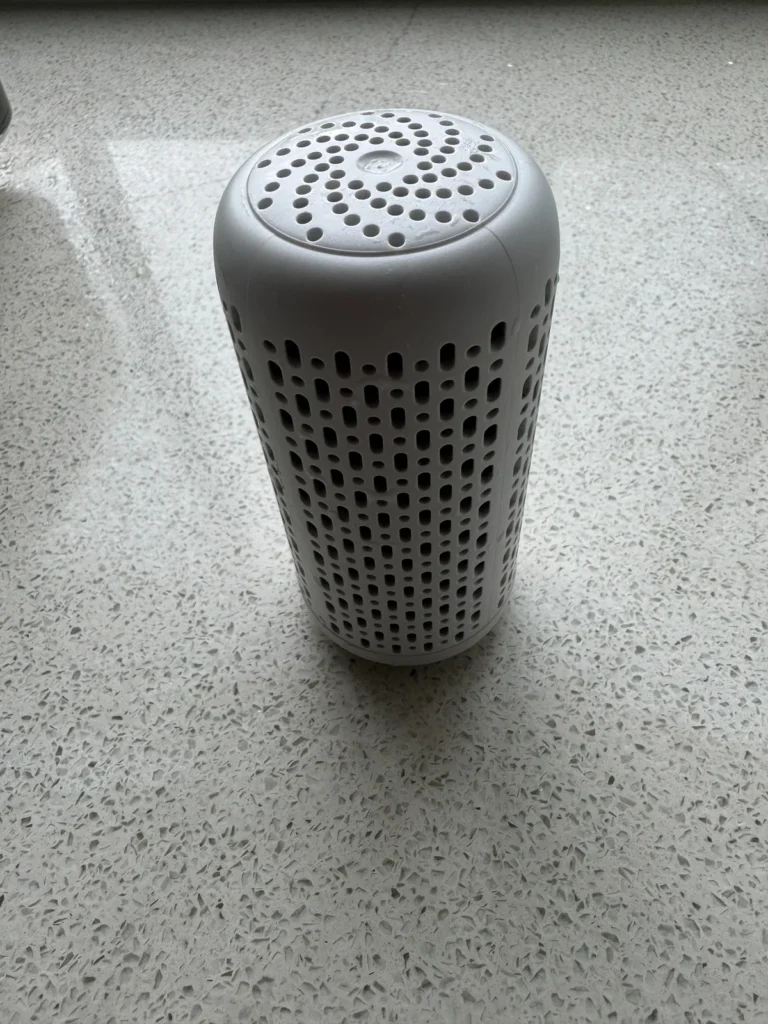
|
Filter condition |
What to do |
|---|---|
|
The manual specifically says it is washable |
Follow that method. Do not add extra detergent or increase the soaking time or scrubbing pressure on your own. |
|
Disposable wick or paper filter |
Replace it as directed for your model. Do not try to extend its life by soaking it in vinegar, bleaching it, or scrubbing hard. |
|
Stiff, damaged, mold-like spots, or a noticeable odor |
Check the replacement guidance. Replace a moldy or smelly filter promptly rather than repeatedly washing it. |
Honeywell, for example, says not to clean its filters with chemicals or soap, and to replace them promptly if they develop mold or an odor. Someone else’s filter being washable doesn’t override that guidance. My family’s health comes first.
How Can Daily Care Help Reduce Scale and Odors?
Humidifier hygiene matters for our health, so regular cleaning is important.
What Water Should You Use in a Humidifier?
The answer depends on the kind of humidifier you have.
A humidifier that releases a visible white mist is probably ultrasonic. It uses high-frequency vibrations to turn water into mist, rather than filtering out impurities in the water.
If your tap water contains a lot of minerals, some can travel into the air with the mist. Over time, you may notice a layer of white dust around the unit. Grime, scale, and odors can build up faster inside it, too. That’s why I generally use distilled water.
A humidifier that doesn’t produce visible mist works differently: a fan speeds up evaporation from a wet filter. Usually, it’s the water that enters the air, while most minerals and other impurities remain on the filter.
If you’re out of distilled water and the manufacturer allows it, you can use tap water. If your water is hard, you may need to remove scale or replace the filter more often.
✕ I don’t recommend adding essential oils, fragrance liquids, or disinfectants to the water.
How Can You Reduce Grime, Odors, and Scale?
Clean it regularly. During use, I also add a little bacteriostatic humidifier water treatment or another humidifier treatment to help reduce or control this buildup and these odors. When using either one, check your humidifier manual and the product directions for your specific model.
How Often Should You Clean a Humidifier, and How Can You Make It Easier?
ⓘ When deciding how often to clean a humidifier, don’t go only by how dirty it looks. For portable humidifiers, the EPA recommends emptying the water, wiping surfaces dry, and refilling with fresh water daily, with cleaning every three days.
In humidifier maintenance, routine cleaning and the schedule for descaling and disinfecting aren’t quite the same thing. Some Vicks and Honeywell guides recommend separate descaling and disinfecting once a week. That doesn’t mean you can leave old water sitting there for a week—daily cleaning and water changes still matter.
To keep a humidifier clean, I focus on three small habits: empty leftover water rather than keep topping it up; use distilled water when low-mineral water is better suited to the unit; and clean and dry the removable parts before putting them back when it’s not in use. Distilled water can reduce mineral buildup, but it doesn’t replace cleaning.
How Should You Store It When the Season Ends?
Give it a thorough cleaning before storing it. Remove any scale while you’re at it, and complete any disinfection the model requires as a separate step. Let everything dry completely, check whether the filter is due for replacement, and then put it away. Next time you bring it out, check and clean it first instead of simply adding water and switching it on.
When Is a Hard-to-Clean Humidifier Worth Replacing?
A little scale isn’t a reason to buy a new humidifier. If the tank cleans up, the parts are intact, and it works normally, keep using it. But if the tank has cracked, the seals keep failing, and suitable replacement parts aren’t available, stronger cleaners aren’t going to solve that.
I’ve run into another situation myself: the unit still worked, but I couldn’t get rid of the musty smell no matter how much I cleaned it. Eventually, I replaced it with an easy-to-clean humidifier. When shopping again, I looked beyond capacity and appearance. I checked how wide the tank opening was, whether I could reach inside to clean it, how easily the parts came apart, and whether replacement filters would be easy to find.
When You Want to See and Reach Inside the Tank
If you’re tired of scrubbing through a tiny opening, look more closely at how your next humidifier comes apart and whether you can reach the surfaces inside. A stainless steel humidifier like the Carepod One is one option to compare. Its stainless steel tank and inner lid can be removed for washing or put in the dishwasher. The oscillator wand needs to be hand-washed separately, and its electrical connection must stay dry.
What matters to me isn’t the words ‘stainless steel.’ It’s finally being able to reach the places that used to be so hard to clean.
A Few Cleaning Questions That Can Be Confusing
Can You Clean a Humidifier Without Vinegar?
Yes. For a daily or every-other-day cleanup with no noticeable scale, empty the old water, rinse the tank, and use a soft toothbrush or crevice brush in the corners. That’s usually enough. Vinegar is more useful when you need to remove mineral buildup.
Can You Use Hydrogen Peroxide?
Yes. When considering how to clean a humidifier with hydrogen peroxide, follow any specific cleaning instructions from the manufacturer first. When no specific instructions are provided, the EPA describes using 3% hydrogen peroxide on surfaces that touch water, followed by a thorough rinse with clean water. Check the manual before treating filters, coatings, or other special parts this way.
Can You Use a Dishwasher or Boiling Water?
Only use those methods on parts the manufacturer specifically allows. One stainless steel tank being dishwasher-safe doesn’t mean the wand, seals, or entire machine can go in, too. Don’t judge heat resistance by the material alone; check the instructions for that model and its parts.
Is White Dust From a Humidifier the Same as Scale?
Not quite. Hard scale is mineral buildup left inside the unit. Some ultrasonic humidifiers carry minerals out with the mist, which then settles on the table or nearby surfaces as white dust.
If this keeps happening, I check the water I’m using first. Switching to distilled water can reduce mineral-related dust and scale, but the humidifier still needs its regular cleaning.
It Still Isn’t Misting After Cleaning. Does It Need More Descaling?
Not necessarily. If it still isn’t misting after cleaning, I first check whether the tank, float, and parts I removed are back in place, then look at the troubleshooting instructions. An evaporative humidifier may not produce a visible mist in the first place, and scale isn’t the only reason other models stop misting. If there’s leaking, unusual heat, or a burning smell, I don’t keep taking the base apart. I stop using it and contact the manufacturer.
Cleaning a humidifier doesn’t have to be as difficult as it seems. Change the water regularly, clean it when it’s due, and deal with scale as it appears. That’s usually much less work than waiting until the inside is dirty and smells off before tackling a big cleanup.